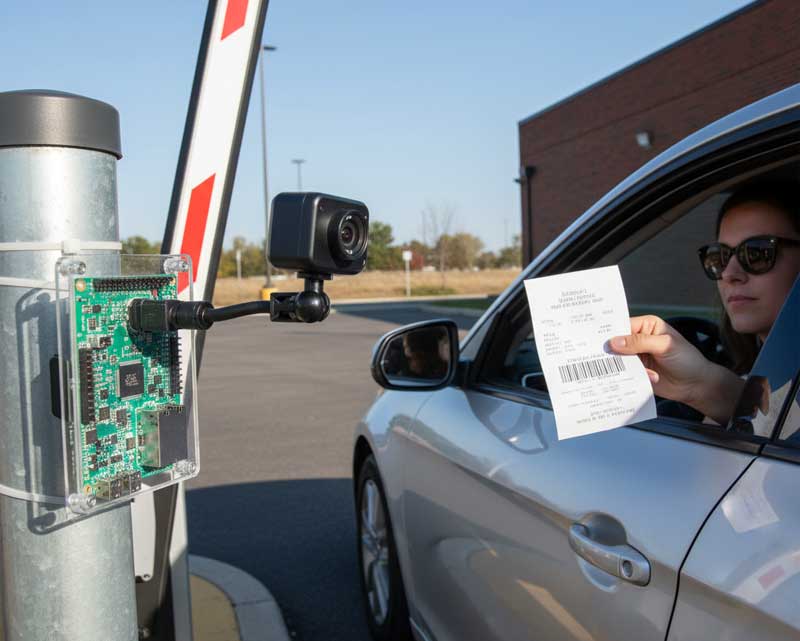
The Raspberry Pi Barcode Scanner is a software application (called dsreader) that transforms a Raspberry Pi (or other compatible Linux ARM device) paired with a webcam into a fully functional barcode scanner.
With just minimal hardware (a Pi + a camera), the system can decode a wide variety of barcode formats—both linear (1D) and 2D.
Below is a breakdown of its capabilities, application domains, and advantages.
How It Works / Technical Overview
- The dsreader app runs on Linux (ARM) and interfaces with a connected camera to capture video frames.
- When a barcode appears in the camera’s field of view, the software decodes it in near real time.
- It supports controlling external output devices, for example:
- Blinking an LED when a barcode is successfully read (via a GPIO pin)
- Sounding a buzzer on a separate GPIO pin
- The software includes a set of command-line options (e.g. choosing video device, LED pin, beep pin, frame size, etc.). It supports a broad range of barcode symbologies:
1D (linear) codes
- Interleaved 2/5, Industrial 2/5
- Code 39 (and extended)
- Codabar, Code 11
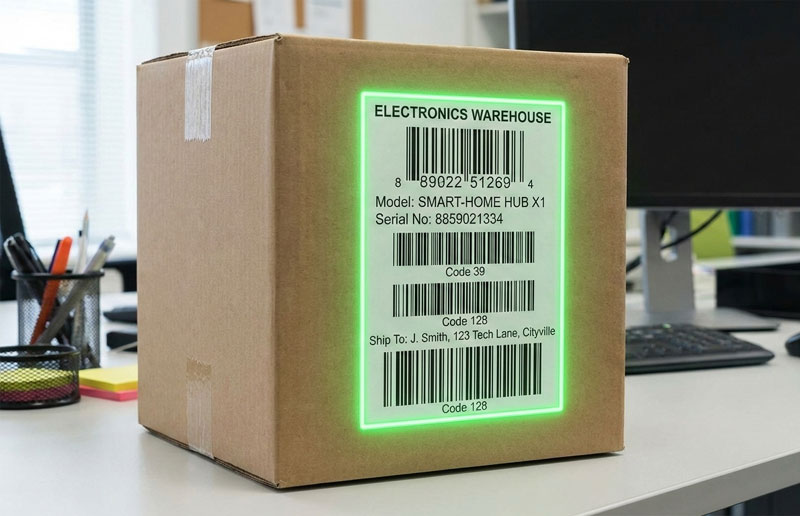
- Code 128 (and extended), EAN/UCC 128
- UPC-E, UPC-A
- EAN-8, EAN-13
- Code 93 (and extended)
- DataBar variants: Omnidirectional (RSS-14), Truncated, Limited, Stacked, Expanded, Expanded Stacked
2D codes
- PDF417 (including Compact / Micro)
- QR Code (and Micro QR)
- DataMatrix
- Aztec Code
The system is versatile enough to run on other ARM Linux boards (e.g. Orange Pi) in addition to Raspberry Pi.
Application Areas / Use Cases
Because the system is low-cost, flexible, and highly programmable, it can be used in many domains:
- Inventory management / warehousing
Use a Pi + camera scanner to track incoming/outgoing goods, manage stock, mark locations, or integrate with warehouse management systems. - Retail / point-of-sale (POS) systems
Embedded in kiosks or small checkout counters, particularly where a full commercial scanner is overkill. - Self-service stations / vending / kiosks
For example, in self-checkout lanes, library self-check stations, or unattended kiosks that need to scan barcodes (product codes, membership cards, tickets). - Access control & ticketing
Use the scanner to read QR / DataMatrix codes on tickets or passes (e.g. event entry, transit), integrated with access systems. - Logistics / package tracking
For sorting centers, scanning parcel labels, automating scanning workflows. - Industrial / automation
In production lines, robotics, conveyor systems—scanning items as they pass by, triggering downstream processes. - Custom hardware / IoT projects
Makers, hobbyists, or embedded systems engineers can integrate the scanner into custom devices, combining it with sensors, displays, or control systems.
Advantages & Strengths
- Low cost / minimal hardware
You don’t need a dedicated barcode scanner device; just a Pi (or similar) plus a standard webcam suffices. - Flexibility & customization
Because it’s software, you can integrate it into your own workflows, extend it with your logic (e.g. filtering, validation, remote upload), or interface with GPIO for custom signaling. - Wide barcode support
It handles most common 1D and 2D barcodes, making it suitable for many applications. - GPIO integration
The ability to blink an LED or sound a buzzer gives instant feedback to users or visual/audible confirmation without needing external electronics. - Portability / embedded deployment
The whole setup can be compact, low-power, and embedded into devices or enclosures, making it ideal for embedded or field use. - Cross-platform and ARM support
Not limited only to Raspberry Pi; other ARM Linux boards are supported. - Open to further development
Users can wrap this scanner in a service, communicate over network ports, or incorporate more features (e.g. logging, network communication, GUI frontends).
Limitations & Things to Consider
- Camera & optics quality
The performance heavily depends on the quality of the camera, its focus, resolution, lighting, and framing. A poor camera will lead to misreads or failures. - Lighting & contrast
Barcodes need to have sufficient contrast and be well lit. In low light or with glare/reflection, decoding may fail. - Decoding speed & CPU load
On lower-end Pi models, decoding complex codes or high frame rate scanning might tax the CPU—skipping frames or using reduced resolution may help. - Field of view / distance
The range at which barcodes can be decoded depends on optics, focal length, and resolution. For long-distance scanning, a specialized lens or camera might be needed. - Robustness & ruggedness
For harsh industrial environments, the camera, housing, and mounting need to be robust (dust, vibration, moisture protection). - Calibration & focusing
If using a camera with manual focus, initial calibration may be required to achieve sharp barcode images.
Example Setup & Usage Flow
- Download & install dsreader
Use wget to fetch the dsreader.zip package, unzip it, and set execute permissions. - Run the scanner
Execute ./dsreader (or specify options) to start the barcode scanning process. - Optional hardware feedback
Add an LED (connected to a GPIO pin) and enable it via -l option so the LED blinks when a barcode is read.
Similarly, a buzzer can be connected and controlled via a GPIO pin using -b. - Use command line options
You can pass options such as video device path (-v), frame width/height, LED duration, beep duration, skip frames, etc. - Integration
You might capture output (barcode text) and send it over TCP/IP, write to a file or database, or respond to scans in real time for automation tasks.
Ready to get started?
Barcode Scanner App for Raspberry Pi